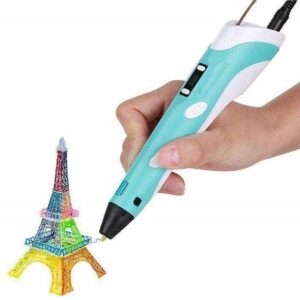
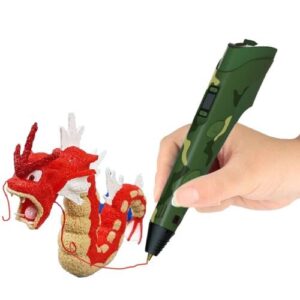
A 3D printing pen is a simple yet powerful device, like holding a miniature 3D printer in your hand. Whether you’re a student, artist, hobbyist, or DIY enthusiast, a 3D pen opens the door to endless creativity, design, and innovation.
But as magical as it sounds, using a 3D printing pen well takes more than just switching it on and doodling. Many beginners make common mistakes that can lead to wasted materials, messy results, and unnecessary frustration. This guide will help you avoid those pitfalls and teach you how to use your pen like a true professional.
What Exactly Is a 3D Printing Pen, and How Does It Work?
Before we get into the common challenges, let’s cover the basics.
A 3D printing pen works similarly to a traditional 3D printer, but instead of a computer-controlled machine, you are the printer. The pen heats up plastic filament—called 3D printer filament—melting it just enough so you can draw freely in any direction. As the filament cools, it hardens into a solid shape.

These pens can work with various types of filament, including popular materials like PLA and ABS, as well as more specialized filaments such as PCL or PETG. Knowing which filaments are compatible with your pen is essential for creating clean, strong, and beautiful designs.
The 7 Most Common Mistakes Beginners Make (And How to Avoid Them)
1. Over-Extruding Filament
The Mistake: Pressing too hard or setting the speed too high causes too much filament to come out, resulting in blobs and messy lines.
The Fix: Begin at a low speed and get a feel for how much pressure you need. Always check the temperature settings—PLA typically melts at 180–200°C, while ABS requires 220–250°C. If your pen supports temperature control, adjust it based on the filament type.
2. Poor Surface Adhesion
The Mistake: Drawing directly onto slick or glossy surfaces often leads to poor adhesion, where your filament won’t stick and lifts away as you work.
The Fix: Use textured surfaces like construction paper, painter’s tape, or a silicone mat designed for 3D pens. These materials help the 3D printer filament stick better and keep your designs from warping or detaching mid-creation.
3. Moving Too Fast or Too Slow
The Mistake: Speed is everything with a 3D printing pen. If you move too fast, the filament stretches and snaps. If you move too slowly, you get thick, clunky lines.
The Fix: Practice steady hand movements. A moderate pace allows the filament to cool just enough to keep its shape while still being flexible enough to form curves and corners.
4. Ignoring Filament Compatibility
The Mistake: Not all pens are compatible with all types of filament. Using the wrong material can clog the pen or damage the heating element.
The Fix: Check your pen’s manual for compatible filaments. Most entry-level pens support PLA and sometimes ABS. Higher-end pens may support PCL (low-temp filament) or flexible filaments. Never force a filament if it’s not meant for your pen.
Pro Tip: Store your 3D printer filament in airtight containers with silica gel packs to avoid moisture absorption, which can cause inconsistent extrusion and clogs.
5. Lack of Maintenance
The Mistake: Many users overlook routine cleaning. Old filament remnants can solidify and block the nozzle.
The Fix: Unload your filament after each session and clean the nozzle with a cleaning rod or soft-bristle brush when it’s still warm (but not hot). Some pens offer self-cleaning modes—use them regularly.
6. Jumping into Complex Designs
The Mistake: Excitement often leads beginners to try intricate projects right away, which can result in unstable structures and frustration.
The Fix: Start with basic shapes—squares, circles, simple 3D boxes. Use templates or stencils to guide your designs. Once you get comfortable, gradually work your way up to complex models.
7. Skipping the Design Phase
The Mistake: Many users begin “drawing” without any plan, which can quickly lead to misalignment or running out of space.
The Fix: Sketch your design on paper first. Use this as a guide to map out proportions, placement, and layering. A good plan can mean the difference between a flimsy sculpture and a polished 3D artwork.
Choosing the Right Filament – The Key to Quality Creations
Here’s a quick overview of popular 3D printer filament types for pens:
| Filament Type | Melting Point | Pros | Cons | Best For |
|---|---|---|---|---|
| PLA | 180–200°C | Eco-friendly, easy to use | Brittle, not flexible | Beginners, basic models |
| ABS | 220–250°C | Strong, heat-resistant | Fumes, warps | Functional parts |
| PCL | 60–70°C | Safe, low temp | Soft, slow cooling | Kids, education |
| PETG | 220–250°C | Durable, slightly flexible | More expensive | Advanced users |
Tip: Always use filament compatible with your 3D printing pen to avoid performance issues.
Extra Tips for Success
- Use templates and stencils: Great for building muscle memory and ensuring proportional shapes.
- Watch tutorials: Platforms like YouTube have tutorials for every skill level.
- Join a community: Share your work and get feedback in forums like Reddit, Facebook groups, or online maker communities.
- Experiment creatively: Try layering, blending colors, or adding LED lights for unique effects.
Mastering the Art of 3D Pen Creations
Using a 3D printing pen is more than just a fun pastime, it’s a skill. With the right mindset, good habits, and an understanding of filament compatibility, you can avoid beginner mistakes and start building incredible 3D art.
Think of each line you draw as part of a learning journey. Each project, whether it’s a simple keychain or a miniature Eiffel Tower, helps you improve. As you grow more confident and skilled, your imagination will be the only limit.
So keep your pen steady, your ideas fresh, and your filaments dry because your next 3D masterpiece is just one line away.


